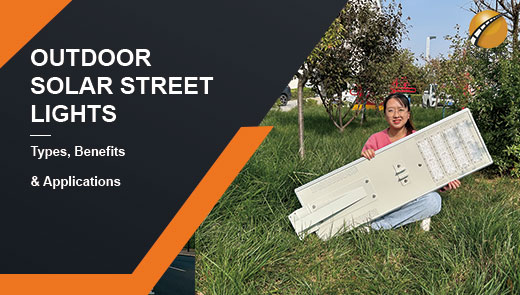
How to Install Solar Street Lights
In today's pursuit of sustainable development, solar street lights, as an energy-saving and environmentally friendly lighting solution, are gradually becoming an important part of modern infrastructure. It utilizes solar energy as a clean energy source, converting solar energy absorbed during the day into electricity to be stored for nighttime lighting, greatly reducing the dependence on traditional electricity and realizing the efficient use of energy. In the long run, solar streetlights can also save users a lot of electricity expenses and reduce operating costs.
This article will introduce the whole process of solar street light installation in detail, covering from the initial site selection to the preparation work before installation, specific installation steps, precautions during installation, common errors and avoidance methods, as well as post-maintenance and other aspects of the content, to provide you with comprehensive and professional installation guidance.
How to Choose the Right Solar Streetlight Location?
Sufficient sunlight
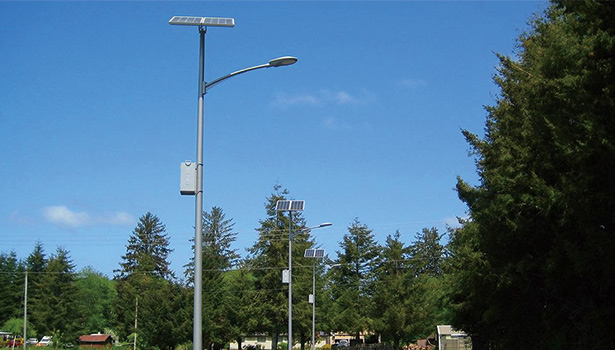
The work of a solar street light depends on the absorption and conversion of sunlight by solar panels; therefore, it is crucial to choose a location that can get enough sunlight. Only then will the solar panels be able to charge the batteries efficiently, ensuring that the streetlight has enough power to illuminate at night. When assessing sunlight exposure, there are tools that can be used, such as a solar pathfinder. It helps us to know exactly how much sunlight the location receives at different times of the day so that we can determine whether it is suitable for installing solar street lights.
Reasonable lighting coverage area
Before installing a solar streetlight, you need to accurately calculate its lighting coverage area according to the actual needs. This involves factors such as the light intensity and beam angle of the streetlight. Different places, such as residential streets, commercial areas, or parks, have different requirements for lighting coverage and intensity. For example, residential streets may pay more attention to uniform lighting effects to ensure the safety of residents traveling at night; commercial areas may require brighter and wider coverage of lighting to create a good business atmosphere. Therefore, these factors should be fully considered before installation to ensure that the streetlights can provide adequate and appropriate lighting for the target area.
Avoid obstructions
Shadows created by tall buildings, trees, or other structures can seriously affect the performance of solar panels. Once a solar panel is obscured by shadows, the area it receives sunlight is reduced, and charging efficiency is drastically reduced, which in turn affects the illumination of the streetlight. When selecting a site, it is important to carefully observe the surrounding environment and identify and exclude locations where shading may exist in advance. If it is not possible to avoid installing in the vicinity of shaded objects, try to ensure that the solar panels will not be shaded during the critical hours of the day (e.g., 10 a.m. to 4 p.m.).
Preparation for Solar Street Light Installation
Site assessment
A thorough site assessment is essential before installing solar streetlights. The assessment looks at a number of key elements, including terrain conditions, soil type, and the presence of existing power lines. A site with flat and open terrain is more conducive to the installation and proper operation of the streetlights; different soil types, such as sandy soil and clay, have different requirements for foundation construction, which can affect the depth and stability of the foundation. At the same time, knowing whether there are existing power lines within the site can avoid damage to them during construction and ensure construction safety. The results of the site assessment will directly affect the development of the entire installation plan and provide an important basis for subsequent work.
Design and planning
Number and spacing of light poles: The number and spacing of light poles need to take into account a variety of factors, such as traffic flow and pedestrian activity. On roads with heavy traffic, in order to ensure driving safety, more street lights with smaller spacing need to be set up to provide adequate lighting. And on trails with fewer pedestrians or in remote areas, the spacing of streetlights can be increased appropriately.
Pole height and LED bulb wattage: the determination of the height of the pole should be based on the degree of openness of the lighting area and the required range of lighting to decide. Generally speaking, higher poles can provide a wider range of lighting but also need more powerful LED bulbs to ensure the brightness. At the same time, the wattage of the LED bulb should also consider the balance between energy saving and lighting effect to avoid too high wattage leading to energy waste or too low wattage that cannot meet the lighting needs.
Obtaining the necessary permits
Before installing solar street lights, you must apply for and obtain a series of necessary permits from the relevant local authorities. Common permits include construction permits, electrical work permits, and land use permits. The application process for these permits may vary from region to region and generally requires the submission of detailed installation plans, site use descriptions, engineering design drawings, and other materials. During the application process, it is important to prepare the documents in strict accordance with the requirements of the local authorities and actively cooperate with the review process to ensure the legality of the installation work.
Carefully study the installation manual
The installation manual for solar street lights contains a wealth of important information that must be carefully studied before installation. Focus on the circuit schematic diagram, which can help us clearly understand the electrical connection relationship of each part of the streetlight and avoid mistakes in the wiring process. At the same time, the safety instructions in the installation manual are also crucial, which details the safety matters and protective measures that need to be paid attention to during the installation process to protect the personal safety of the installer. In addition, familiarity with the installation steps can make the installation work smoother and reduce errors and delays caused by unfamiliar operation.
Prepare a complete solar streetlight kit
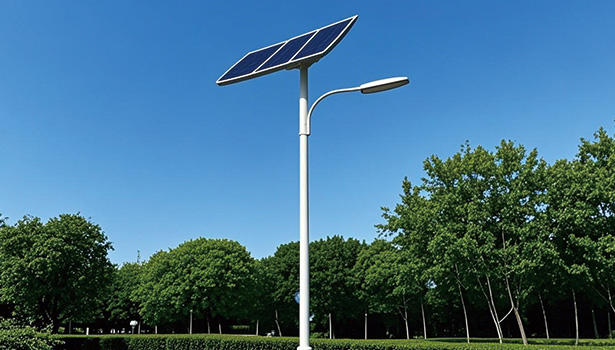
A complete solar street light kit usually contains components such as a controller, battery box and batteries, light pole, solar panels, light fixtures, access panels, solar mounts (mounting feet), and a foundation cage. When preparing the kit, carefully check the quality of each component. For example, the solar panel should be free of obvious scratches and breakage, the capacity and performance of the batteries need to comply with the product specifications, and the light poles should be sturdy and have intact surface coating. Ensuring that all components are of satisfactory quality is the basis for ensuring the normal operation and service life of the solar streetlight.
Solar Street Light Installation Steps
Foundation construction
Excavate the foundation pit
According to the height of the pole, determine the depth and width of the foundation pit. Generally speaking, the depth is between 700 mm and 1500 mm, and the cross-section size of the pit is 500×500 mm to 600×600 mm. Use suitable excavation tools, such as a backhoe or hand digging tools, to ensure that the walls of the pit are vertical and the bottom of the pit is level.
Placement of footing bolts
Place the footing bolts into the foundation pit, taking care to wrap the threads and nut portion of the bolts with ground tape to prevent the concrete from adhering to them when pouring the concrete, which will affect subsequent installation. Make sure the position of the foot bolt is accurate and perpendicular to the bottom of the pit to ensure the stability of the light pole installation.
Pouring the concrete foundation
Mix cement, sand, gravel, and water accurately according to the concrete proportioning instructions. Pour the mixed concrete slowly into the foundation pit, and use tools to vibrate while pouring to expel air bubbles in the concrete and make the concrete more dense. Make sure the concrete is poured to the designed height and the surface is level.
Wait for the concrete to cure
It takes time for the concrete to cure, usually at least 3 days. During the curing period, avoid disturbing the foundation and make sure the ground bolts are firmly fixed in the concrete to provide stable support for the subsequent installation of the light poles.
Installation of solar panels and luminaires
Attach the solar panel to the bracket
Carefully place the solar panel on the solar bracket and use the bolts to fix the solar panel to the bracket. During the operation, hold and place the solar panel gently to avoid physical damage to it. Make sure the solar panel is tightly attached to the bracket and will not wobble.
Lift one end of the pole and place it on the support platform
Using suitable lifting equipment, such as a crane or manual hoist, lift one end of the pole and place it on the prepared support platform. Ensure that the light pole is placed in a stable position to avoid tipping over during subsequent installation.
Attach the bracket with the solar panel to the top of the light pole
Fix the bracket with the solar panel mounted to the top of the light pole and adjust the angle of the solar panel by rotating the sleeve of the bracket to maximize the sunlight it receives. Connect the cable of the solar panel with the plug on the battery pack; make sure the connection is firm and the cable is not broken.
Attach the fixture to the arm
Connect the cables on the fixture to the controller inside the battery pack according to the wiring diagram of the fixture. Ensure that all connections are tight and firm to prevent problems with poor electrical connections. During installation, take care to protect the luminaire from collision damage.
Check connections and test the system
After completing the installation of the solar panels and the luminaire, double-check all connection points to make sure the installation is correct. Test whether the streetlight can light up normally by covering the solar panel with cardboard or other objects to simulate the night environment and check whether its charging and lighting functions are normal.
Installation of light poles
Erecting the light pole
Use a crane to erect the light pole vertically and place it slowly on the concrete foundation so that the 4 bolt holes at the bottom of the pole are aligned with the ground bolts on the foundation. During placement, pay attention to the orientation of the pole to ensure that the light arm is perpendicular to the direction of the road for optimal illumination.
Fixing the light pole
Use the bolts and nuts to fix the light pole to the foundation. Tighten the nuts with an adjustable wrench to ensure that the light pole is firmly fixed to the foundation and will not wobble. During the tightening process, tighten the bolts diagonally and sequentially so that the force on the light pole is even.
Precautions for solar streetlight installation
Ensure that each component is firmly fixed
When installing a solar streetlight, each component must be firmly fixed. The solar panel should be securely mounted on the solar panel bracket, the lamp should be accurately mounted on the lamp arm, and the bracket and the lamp arm should also be firmly connected to the main lamp pole. At the same time, the connecting wiring should be properly introduced to the control box. Before lifting the pole, be sure to double check that the fasteners in each part are tightened, that the lamps are installed correctly, and that the light source works properly. Any looseness in any part may cause the streetlight to malfunction in the course of use or even cause safety problems.
Debugging system operation
Before the installation is completed, the system needs to be debugged to ensure its normal operation. First of all, loosen the connection line between the controller and the solar panel; at this time, the light source should be able to work normally, and the solar panel connection line should be connected to the light source that should be extinguished. At the same time, carefully observe the changes in the indicator lights on the controller to ensure that all data display normally. Only after the system debugging passes can we proceed to the next step of the installation operation.
Be careful when lifting the light pole
In the process of lifting the light pole, make sure that all screws have been tightened. If the angle of the components is found to be wrong, it should be adjusted in time. At the same time, pay attention to the orientation of the solar panels, which should be oriented completely towards the south in order to obtain the best sunlight exposure. Strictly follow the safety operation procedures during lifting to ensure the safety of personnel and equipment.
Connection of Battery and Controller
After putting the battery into the battery box, connect the cables to the controller according to the technical requirements. The connection order is to connect the battery first, then connect the load, and finally connect the solar panel. In the wiring operation, pay special attention to the wiring and terminals labeled on the controller; positive and negative polarity cannot be confused, not to mention the reverse, otherwise it will damage the controller.
Debugging the system again to confirm normal operation
After completing the above installation steps, loosen the connection line of the solar panel on the controller again; at this time, the light source of the solar street light should light up; after connecting the connection line of the solar panel, the light source should go out. At the same time, carefully observe the changes of the indicator lights on the controller to ensure that all data are normal. After confirming that there is no error, the control box can be sealed.
5 Common Mistakes in Installing LED Solar Street Lights
Installed in a place with a lot of shade
LED solar street lights rely on sunlight to be absorbed during the day and stored in the battery, and the battery converts solar energy into electricity to power the street lights at night. However, solar panels need plenty of sunlight to recharge. If the streetlight is installed in an area with a lot of shade, such as a heavily wooded area or an area covered by buildings, the solar panels will not be able to absorb enough sunlight, and the streetlight may not come on or may be dimly lit. Before installation, be sure to double-check the mounting location to ensure that the solar panels will receive sufficient sunlight.
Installation near other light sources
LED solar streetlights have their own control system that can distinguish between day and night. If you install other power light sources near the solar street light, the solar street light system will mistake it as daytime when the other light sources are on, which will cause the street light not to light up. Therefore, when choosing the installation location, avoid being close to other light sources that are continuously illuminated.
Solar Panel Installation in Shaded Areas
A solar panel consists of a series of battery cells, and if a part of it is not exposed to sunlight for a long period of time, this group of battery cells will not work properly. Similarly, if a solar LED street light is installed in a location where there is shade that prevents an area of the solar panel from being exposed to sunlight for an extended period of time, that area will not be able to convert the sunlight into electricity, which is equivalent to a short-circuiting of the batteries in that area. When installing solar panels, make sure there are no obstructions around them.
Solar streetlights installed on both sides of the road with solar panels tilted face-to-face
It is common practice to install street lights on both sides of a road, but problems can arise if the solar panels on the street lights on both sides are tilted face-to-face. Since the sun rises in the east, if one side of the streetlight faces east and the other west, one side will inevitably turn its back to the sun and not be able to absorb sunlight. The correct installation is to have both sides of the solar panel facing the same direction to ensure that both can absorb the sunlight.
Charging a solar streetlight indoors
Some users install their solar street lights in garages or other indoor spaces for easy lighting. However, indoors, the solar panels are completely unable to absorb sunlight and convert it into electricity for lighting. If you do need to use solar lighting indoors, you can install the solar panels and lamps separately so that the solar panels can be charged outside and the lamps can be illuminated indoors. Of course, other lamps suitable for indoor lighting are also available.
Do solar streetlights need maintenance?
Areas that require maintenance
Although solar streetlights are designed to be largely maintenance-free, in areas with extreme conditions, some level of maintenance is still required to ensure that the streetlight works properly. In dusty, snowy, or icy areas, dust, snow, or ice may cover the solar panels and reduce their ability to generate electricity. In areas with frequent rainfall, the tilt angle of the solar panels allows them to self-clean dust to some extent. However, in areas where rainfall is sparse, it may be necessary to manually clean the solar panels on a regular basis.
Maintenance Program
Weekly Inspection
The streetlights are inspected weekly to ensure that all streetlights are working properly. If you find any streetlights that do not work, analyze the cause and repair them promptly. The inspection includes whether the lamps are damaged, whether the wiring is loose, and whether the battery power is normal.
Clean the panel every two months
Check the panel of the solar streetlight every two months and clean the panel covered by dust or sand. Use clean water and a soft cleaning cloth to gently wipe the solar panels from the top to the bottom to remove surface dirt and ensure that the solar panels can absorb sunlight efficiently.
Replace the batteries every 5-7 years
When the battery voltage drops below the normal level, you need to replace the batteries of your solar street light. Generally speaking, the expected life of solar street light batteries is 5-7 years. When replacing the batteries, choose products with the same specifications as the original batteries and follow the correct procedure.
Solar street light installation is a systematic project, from the initial site selection, to all the preparatory work before installation, to the specific installation process, as well as post-installation maintenance, each link is crucial. Correct installation and regular maintenance can not only ensure that the solar street light can provide us with long-term stable lighting service but also give full play to its energy-saving and environmentally friendly advantages. We hope that the introduction of this article can help you successfully complete the installation of solar street lights and enjoy the many conveniences it brings in the future.


